Persistent Data Storage in Core
Overview
An amazing way to keep people coming back to your projects is if they can continue to progress more each time.
You might be familiar with this in many other games or projects you have played through; there are achievements, player levels, locked stages, the need to amass currency for certain items... the list can go on! Without persistent storage, each playthrough of a game starts completely from scratch and players do not get a sense of long-term accomplishment as easily as they could if their accomplishments were saved for them.
Here are just a few ideas on ways that persistent storage can be used:
- Player High Score
- Player Level
- Player Equipment
- Player Resources
- Object Location
- Map Level for a Player
- Currency
- Achievements
- Whatever else you can think of!
Really, anything that you might want to preserve for the next play session for that same player can be stored.
- Completion Time: 10 minutes
- Knowledge Level: No knowledge absolutely required, but this will be easier to understand with a grasp on Lua already.
- Skills you will learn:
- How to store variables persistently between game sessions
- How to spawn stored template save data
Storage in Core Lua
Persistent Player Storage is available under the namespace called Storage. The available built-in Lua calls are:
Storage.GetPlayerData(Player)- Returns a table
- Is server-only
Storage.SetPlayerData(Player, table)- Is server-only
All successfully stored data in preview mode can be viewed in your computer's File Explorer in Saved/Maps/your_map_name/Temp/Storage/. This data is just for debugging purposes and does not get uploaded to Core servers.
Each player table has a maximum size limit of 16Kb.
To read more about the supported data types that can be saved, as well as the possible error code results, check out the Storage section of the Core API.
Tutorial: Part One
This tutorial is going to go over some basic examples of using Storage, as the Lua is simple but the possibilities are infinite.
To start, we are going to save a video game classic: a player's game score.
Setting Up Storage
-
Open a Core project.
-
To turn on persistent game storage, we need a Game Settings Object. Every Core project comes with one by default. If you don't have one, navigate to the Core Content window, and click the Settings Objects tab under the GAME OBJECTS section. Drag the Game Settings Object from this section into your project Hierarchy.
Another Location for Settings Objects
Settings objects can also be found in the top menu bar of Core, under Object > Create Settings Object > Create Game Settings.
-
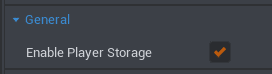
Now select the Game Settings object in your Hierarchy, and check out the Properties window. Check the box for Enable Player Storage on.
-
Create a new script using the button in the top toolbar of Core, and while you can call it whatever you like, in this tutorial let's call it
AddHighScore.
-
We need somewhere to display the changes to our score, so let's create some World Text to edit while the game runs.
- In Core Content, under the UI Elements section, drag two WorldText objects into your project Hierarchy.
- Name one of these
PlayerName, and the other onePlayerScore. - Feel free to change the color or default text properties of these labels in the Properties window, or move them around in the world to where you would like. You might want to rotate them, and be aware of where the player is spawning to view these correctly.

-
Drag your
AddHighScorescript into your project Hierarchy if you haven't already. -
Next we'll want to create custom property references to this on the
AddHighScorescript. Select theAddHighScorescript in the Hierarchy, and with it still selected, drag each one of the WorldText objects into the Properties window forAddHighScore. This will automatically create a Core Object Reference to the objects we are dragging in! -
Select both the
PlayerScore&PlayerNameobjects in the Hierarchy, and right click them to select "Enable Networking". By doing this, they can be modified as the code runs. That way we can change what the text says! -
Now on to the programming of storage itself! Open the
AddHighScorescript to get started.
Writing the Code
-
With our script open, we first need to access those references that we added as custom properties. This code looks like:
local PLAYERNAME_LABEL = script:GetCustomProperty("PlayerName"):WaitForObject() local SCORE_LABEL = script:GetCustomProperty("PlayerScore"):WaitForObject() -
Next comes the function for causing the score to increase. In our super simple case, we'll just increase the player's score by +1 every time they press the number 1 key. This function looks like:
function OnBindingPressed(whichPlayer, binding)
    if binding == "ability_extra_1" then
        local playerDataTable = Storage.GetPlayerData(whichPlayer)

        if playerDataTable.score then
            playerDataTable.score = playerDataTable.score + 1
        else
            playerDataTable.score = 0
        end

        local errorCode, errorMsg = Storage.SetPlayerData(whichPlayer, playerDataTable)

        if errorCode == StorageResultCode.SUCCESS then
            SCORE_LABEL.text = tostring(playerDataTable.score)
        else
            UI.PrintToScreen(errorMsg)
        end
    end
end
What is this function doing?
In a nutshell, this is a function for what happens when the player presses any button. The first "if statement" is checking that the button the player pressed is the one that we are looking for,
ability_extra_1.It then creates a reference to the player's storage data table. If the player already had an existing data table with
scorein it, it will add +1 to that score. If the player did not already have a data table, it will set thescoreentry of the data table to 0.Next it's setting up an error message, so that when the function is activated it will print to the Event Log whether saving the data was successful or not.
And that's it!
-
After that, the next function we need determines what to do when a player joins the game. This is where we can initialize the storage data table for that player, and set their
scoreto 0 if they don't already have one. This code looks like:function OnPlayerJoined(player) local playerDataTable = Storage.GetPlayerData(player) if not playerDataTable.score then playerDataTable.score = 0 end SCORE_LABEL.text = tostring(playerDataTable.score) PLAYERNAME_LABEL.text = player.name .. " Score:" player.bindingPressedEvent:Connect(OnBindingPressed) endOkay, how about what this function is doing?
This functions will happen every time a new player joins the game. This gives an opportunity to check their data table, plug in their data (username and score) to the UI we made, and create a starting
scorefor them if they've never played before.Lastly, it is connecting the previous function we made to the player event that happens whenever the player presses a button. Now the
OnBindingPressed()function is hooked up! -
Finally, we've got to connect the
OnPlayerJoined()function that we just wrote to theplayerJoinedEventin theGamenamespace. This officially hooks up the function we made to the built-in event that is triggered when a player joins. Check it out below:Game.playerJoinedEvent:Connect(OnPlayerJoined) -
Now press play to jump in the game and test it out!
Whenever you press 1 on your keyboard, the number on-screen will increase!

Congrats, you've learned the basics of Persistent Data Storage in Core. Now go forth, and save awesome things!
If you'd like another example using a different type of object to save, try the second half of this tutorial.
Tutorial: Part Two
Saving a number is great and fine, but there are so many things that you can save with persistence. Next, let's try saving the player's equipment.
Modifying Existing Code
We're going to edit the script we already used in the first half of the tutorial, AddHighScore. Since we already made an OnPlayerJoined() function here, it's easiest to modify this to also work for loading the equipment we are going to save.
-
Open the
AddHighScorescript, and in theOnPlayerJoined()function, beneath theConnect:line that we wrote, include this code:if not playerDataTable.equipment then print("No player data equipment found.") return end local newWeapon = World.SpawnAsset(playerDataTable.equipment) newWeapon:Equip(player)This means the whole function should now look like this:
function OnPlayerJoined(player)
    local playerDataTable = Storage.GetPlayerData(player)

    if not playerDataTable.score then
        playerDataTable.score = 0
    end

    SCORE_LABEL.text = tostring(playerDataTable.score)
    PLAYERNAME_LABEL.text = player.name .. " Score:"

    player.bindingPressedEvent:Connect(OnBindingPressed)

    if not playerDataTable.equipment then
        print("No player data equipment found.")
        return
    end
    local newWeapon = World.SpawnAsset(playerDataTable.equipment)
    newWeapon:Equip(player)
end
What's happening in this code change?
We're doing almost exactly the same thing that we did for loading the player score. Instead of giving the player starting equipment by default, we are just printing a line to the Event Log alerting us that this player didn't have any saved equipment yet. If they did have saved equipment, then we are spawning an instance of that equipment and equipping it onto the player.
-
Now that we've set up our code to load player equipment that we save, we need the actual equipment to save! For this tutorial, we are going to use one of the Advanced Weapons that are included in Core Content.
Navigate to Core Content, and drop down the Game Components category to find the weapons category. From within here, drag the Advanced Shotgun into your viewport window. You can choose any Advanced Weapon that you like--we just need to choose an Advanced weapon as they already come with the script that we need to modify.
-
Once you've dragged in the Advanced Shotgun, you will be able to access all of its scripts from "My Scripts" in your Project Content.
The script we want to modify is called
EquipmentPickupServer. Open this up to get started! -
When you open the script, you'll notice it is already full of variables and functions. We're going to scroll down to the
OnEquipped()function, and add a few lines to it.After all the existing content in the function, but still inside of it, add these lines of code:
local playerDataTable = Storage.GetPlayerData(player)
playerDataTable.equipment = EQUIPMENT.sourceTemplateId
print(EQUIPMENT.sourceTemplateId)
Storage.SetPlayerData(player, playerDataTable)
So now the whole
OnEquipped()function should look like this:function OnEquipped(equipment, player) -- Turn off trigger once equipped if Object.IsValid(TRIGGER) then TRIGGER.collision = Collision.FORCE_OFF end -- Spawn a pickup sound when a player picks up the weapon if PICKUP_SOUND then local pickupSound = World.SpawnAsset(PICKUP_SOUND, {position = script:GetWorldPosition()}) -- Set a default lifespan if the pickup sound template has 0 lifeSpan if pickupSound.lifeSpan == 0 then pickupSound.lifeSpan = DEFAULT_LIFESPAN end end -- Saving equipment to player storage local playerDataTable = Storage.GetPlayerData(player) playerDataTable.equipment = EQUIPMENT.sourceTemplateId print(EQUIPMENT.sourceTemplateId) Storage.SetPlayerData(player, playerDataTable) endSo what is happening this time?
This function fires the moment a player picks up and equips the weapon. At that moment, it sets the
.equipmentproperty of the player storage to be equal to the template ID of the equipment that fired this function. This way, that exact template can be spawned in theOnPlayerJoined()function that we wrote in the first step on theAddHighScorescript. -
We have everything hooked up now! Press play, and pick up the weapon. When you quit preview mode, this weapon will still be saved. Hit play again, and you will automatically have the weapon equipped to you.
Now you know how to save something that needs to be spawned again on the next play session. More tools in your creator toolbelt!
Extra Tips & Info
- Persistent storage data does not transfer between games nor can it be accessed between games.
- Using this same method as the tutorial, you can save all types of data: weapons, player resources, player or object location; whatever you would like. The key elements are loading the player storage when a player joins the game, and setting the player storage when you want something to be saved to it.